Information
3D Printing Troubleshooting – Why Heat Matters in Resin Printing
Are your resin 3D prints failing, warping, or not curing correctly?
Heat plays a crucial role in the success of resin printing, affecting everything from resin viscosity to curing times. Understanding the importance of temperature can significantly improve your print quality.
In this post, we’ll delve into why heat matters in resin printing and provide practical troubleshooting tips to help you achieve flawless prints. By the end, you’ll have the knowledge to tackle heat-related issues and enhance your 3D printing results.
Introduction
Resin 3D printing, known for its high precision and smooth surface finishes, is a popular choice among hobbyists and professionals alike. However, achieving perfect prints can be challenging, especially when dealing with heat-related issues.
Printing with resin is a toxic process which involves both exposure from fumes (VOCs) and contact with the resin without proper PPE (personal protective equipment) should be avoided. Due to the toxicity of resin printing, my own resin printers are moved to my uninsulated garage, which can reach as low as 0°C in the winter times.
Resin manufacturers usually show that the ideal temperature for resin printing between 24-30°C, here is an example from Phrozen Help Center.

The Crucial Role of Heat In Resin Printing
Heat is a fundamental factor in resin 3D printing for several reasons:
1. Resin Viscosity
The viscosity of resin affects how smoothly it flows during the printing process. Printing at a higher temperature can reduce the viscosity, making it easier to layer and cure. Printing at a lower temperature can make the resin thicker and harder to work with, potentially leading to incomplete or failed prints.
2. Curing Process
In resin printing – the resin is exposed to UV light layer by layer. The amount of time the resin should be exposed to the light depends on the temperature: too much heat can cause the resin to cure too quickly leading to warping or cracking, while insufficient heat can result in incomplete curing and fragile prints.
Exposure Time in the 3D Printer slicer regulates this.
3. Printer Performance
The ambient temperature around your printer can affect its performance. Most resin printers are designed to operate within a specific temperature range. Operating outside this range can lead to inconsistent results, such as uneven curing, print failures, and even damage to the printer itself. Keeping your printer in a controlled environment helps maintain optimal performance and prolongs the life of your equipment.
Common Heat-Related Problems in Resin Printing
One of the most common heat related problems in resin printing is temperature fluctuations.
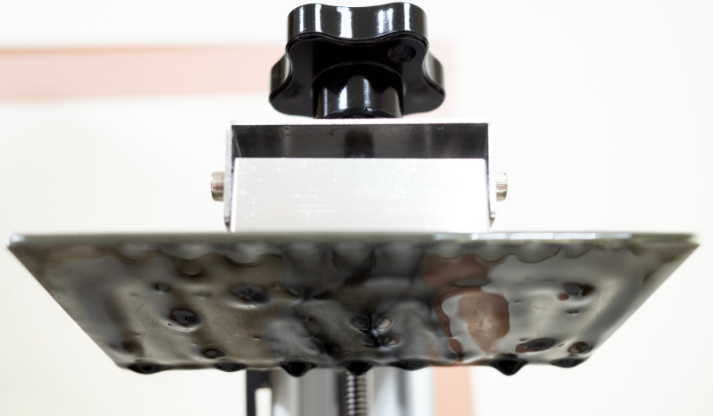
Temperature fluctuations can cause various print failures, such as layers not adhering properly, resin not flowing evenly or prints detaching from the build plate. These issues are often due to the resin’s viscosity changes with temperature variations, affecting how well it sticks to the previous layer or the platform.
Picture this.
After calibrating your resin for the actual resin, you’ve found the perfect Exposure Time of 2,5 seconds at a given temperature in the morning. You start a large print job and the ambient temperature rises through the day. The resin is now Overexposed. Later the same day and throughout the night it gets quite colder. The resin is then Underexposed.
This is why maintaining the ideal temperature is just as important as heat.
Ways to heat your resin printer
Now that we’ve identified that resin needs heat and avoid temperature fluctuations, here are some of my own personal solutions:
1. Resin printer with a built-in heater
Some printers today, like Uniformation GKTwo and Anycubic Photon Mono M5s Pro come with a built-in thermostatic heater. This way the resin is in a printing environment within the recommended temperature range.
2. Mini resin heater
More and more companies are coming out with their own mini resin heaters, like Elegoo and Anycubic which can be placed inside your resin printer lid. I’ve not personaly tried these but I recommend using the heater from Youyoute which has a temperature sensor, accurate to 0.1°C and maintains the heat through the print job.
Read more about mini resin heater here:
– https://strfabrications.com/efficient-mini-heater-for-heating-resin-buyers-guide
The key difference between these heaters and most fan heaters on the market – is that they don’t operate on having built in on/off thermostat. These thermostats work by turning the heater on and raise the temperature to a set value, which it then shuts the heater off. When the ambient temperature dips below a certain threshold value, it will then turn the heater on again. This on/off feature makes temperature fluctuations more visible in your prints, often resulting in noticeable lines and defects.
2. Fermantation belt
A different solution would be to heat up your resin vat using a Fermantation Belt. The fermantation belt is cost effective because it heats the resin directly through contact with the belt.
Read more about fermantation belt here:
– https://strfabrications.com/resin-printing-fermentation-belt-for-heating-resin
3. Use an Enclosure
An enclosure can help maintain a consistent temperature around your printer, shielding it from drafts and temperature changes. Enclosures also help reduce the exposure of UV-sensitive resin to ambient light, further improving print quality.
Conclusion
Understanding why heat matters in resin printing is crucial for effective 3D printing troubleshooting. By maintaining the right temperature, pre-warming your resin, using enclosures, and adjusting UV light settings, you can overcome common heat-related problems and achieve consistent, high-quality prints. Remember, the key to successful resin printing is a stable and controlled environment.


Pingback: New to 3D Printing? Here’s What You Need to Know – Stranden Fabrications